
Make everlasting mementoes and gifts by growing and drying your own flowers, with help from expert floral artist Bex Partridge.
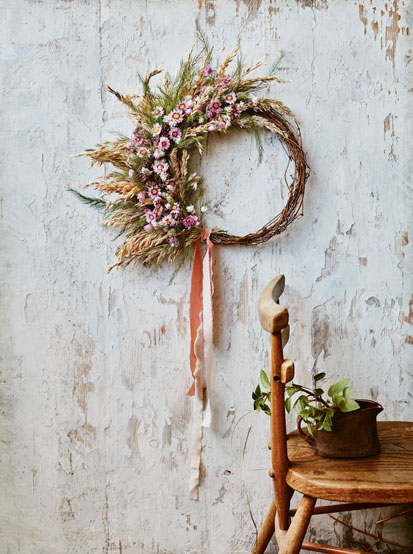
Gardeners may be looking for new ways to make the most of their fruit and flowers this year – and dried flowers are once again catching on. Head-dresses, gift cards, wreaths and framed indoor displays can all be made using dried flowers you’ve grown yourself.
Floral artist Bex Partridge, author of a new book, Everlastings, explains: “Most of us have probably done this at some point and felt the joy of discovering a forgotten pressed bloom as it flutters from the pages of a book.
“While I usually press smaller flowers and leaves, I’ve recently enjoyed drying bigger branches and ferns. The results can be quite stunning and, when included in arrangements, add structural charm.”
What are the best flowers for drying?
“As a general rule, the best plant material to dry tends to have slightly woodier stems that are less juicy in feel – think delphiniums rather than dandelions,” advises Partridge.
The best include Alchemilla mollis (lady’s mantle), astrantia, foxgloves, delphiniums, meadowsweet, honesty, globe thistles, sunflowers, nigella, hydrangea, allium, poppies, scabious and statice, although there are many more, she says.
“Start with perfect specimens, making sure the petal edges are nibble-free. It’s important to press them as soon as you pick them too, otherwise the petals will begin to droop and that will negatively affect the end results.”
Avoid big, blousy blooms
“Most flowers respond well to pressing, with the exception of big, blousy blooms that are too full of moisture or have too many layers to dry out properly, although individual petals can be separated and dried,” says Partridge.
“Daisies, nigella, bluebells and poppies will bring you stunning results. Think about the form of the flowers when pressing – you can press the heads alone or the whole stem and leaves for a striking display.”
What about air drying?
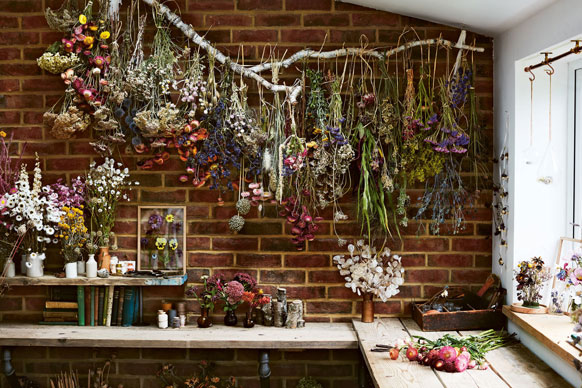
This is the simplest way to dry flowers en masse. Begin by stripping all unwanted foliage from the stalks, leaving some of the top foliage surrounding the flower as it adds extra texture and gives a more natural appearance to arrangements.
Gathering a handful of stems together, wind a length of string or twine around them a number of times, securing it with a tight knot at the end, and leaving enough string to form a loop to hang them with. The stems themselves will shrink as they dry, so make sure you’ve tied the bunches tightly enough to keep them together, but not so tight the stems get crushed.
Ideally, bunch flowers of the same variety together for ease when you use them, or store them in boxes and try to ensure the flower heads aren’t sitting too close together to allow for good air circulation.
Air dry bigger blooms upright
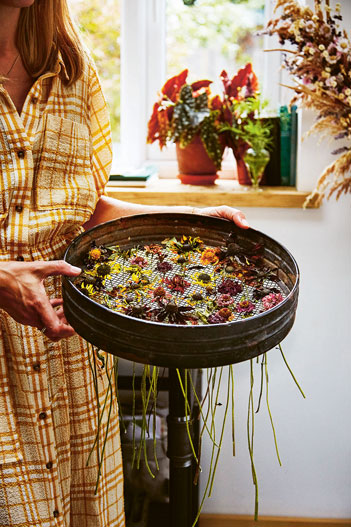
Bigger headed blooms dry better facing upwards, as it results in a more open appearance and, if they have particularly heavy heads, ensures they don’t droop. Partridge uses a reclaimed riddle (flat sieve) for this.
“Stripping the stems of all foliage, I slot each stem individually through the small holes until the head of the flower rests on the mesh. I attach a hook in the centre of the riddle or an upside down wooden crate, and hang it in my drying cupboard.
“If you don’t have a riddle, you can use some fine metal mesh or chicken wire secured to a frame – or a cardboard box with holes punched through would do.”
When air drying…
Always try to dry your materials in a dark place, as light bleaches colour out of flowers. The space you use should be normal room temperature and completely free of moisture in the air. Ideal spots are airing cupboards, cupboards under the stairs, or a dry, shady shed.
You can buy hooks and herb hangers to hang from the ceiling.
How long will it take?
Most things will have dried within three to five weeks, and can either be left hanging where they are or transferred to storage boxes lined with newspaper or tissue paper.
Avoid placing too many bunches on top of each other, to prevent crushing delicate buds and flower heads, then store them in a dark, dry space until you need them. Materials can last many years stored this way.
What if you’re short of time?
“Possibly the easiest method is dry evaporation,” says Partridge. “The beauty of it is, you can enjoy the flowers while they dry, and if it doesn’t work as you’d hoped, you can just compost them.”
After stripping the flowers of any unwanted foliage, and definitely anything that sits below the waterline, put the flowers in a vase and add approximately two inches of water. Ensure the ends of the stalks sit in the water.
Then wait – it can take a few weeks for the flowers to dry completely. There is no need to top up the water. This method works particularly well with hydrangeas, which can be fickle when dried in other ways. Gypsophila, spray roses and mimosa respond well too.
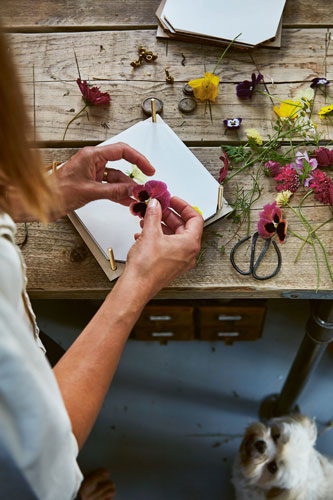
If you’re using a flower press…
Cut off unwanted foliage and use flowers in their prime. If necessary, dry the petals and leaves with kitchen paper or a tea towel to ensure they’re totally dry before pressing them. Store in flat large envelopes or cardboard boxes, with the pressed flowers separated with tissue paper.
And if you don’t have a flower press…
A big book works just as well – as long as you don’t mind a few marks on the pages.
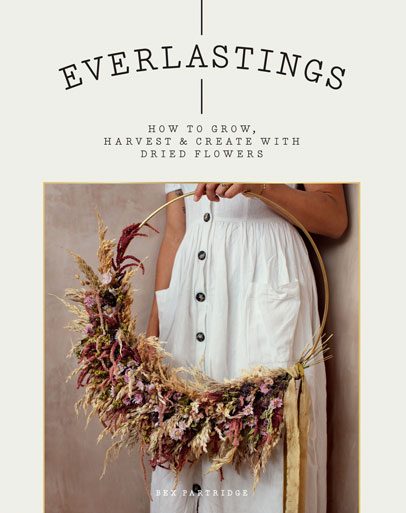
Everlastings by Bex Partridge is published by Hardie Grant, priced £14.99. Available now.