How to Make your Home an Instagram Hit in 6 Simple Steps

Restoring Landsdowne's Kristine Hall shares her styling secrets for 'decor-gramming' success.

If you love your home, you want to show it off – which these days, of course, means posting fab shots on Instagram.

Some of us are apparently so keen to win those likes that we’ll even cheat with ‘fake’ posts! In a survey for the Ideal Home Show, one in six people confessed to having posted an image of someone else’s home and pretended it was theirs. Plus, 18% of the 18-24-year-olds quizzed said they wouldn’t buy a house if they didn’t think it would impress on social media.

That might be taking the trend to extremes, but who doesn’t want Insta-worthy interiors?

Interior designer Kristine Hall, who set up her design and styling company after documenting her own decor project, Restoring Landsdowne (restoringlansdowne.com), knows all about making a space an Insta-hit. Hall’s calm, pared-back Scandi-inspired style is a favourite with decor-grammers (at current count, she has over 44k followers).

Want to steal her secrets? Here, Hall, who will giving advice at the Ideal Home show, shares six simple steps for conjuring an utterly Instagrammable home. Let the posting and boasting begin…

Instagram your home

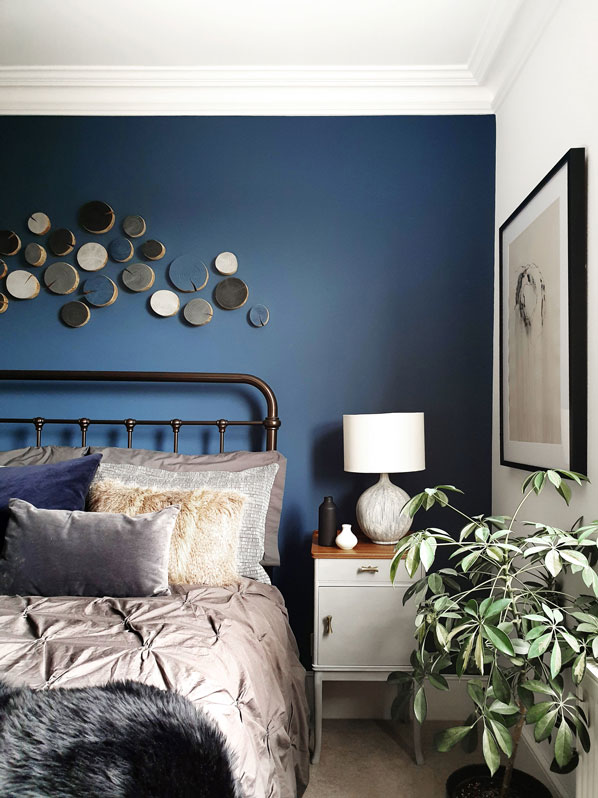
1. Create a feature with paint

“Paint is the easiest and most affordable way to refresh a space and give it the wow factor,” says Hall. “Go a step further and use it to define an area, an architectural feature, or create character in an otherwise bland room.

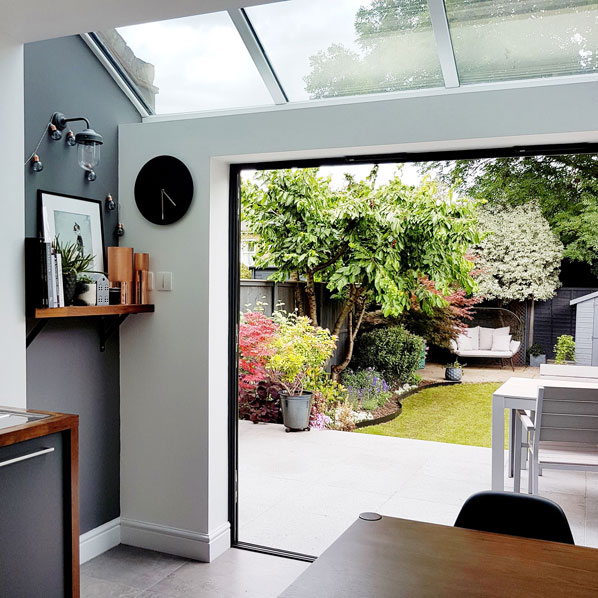
“Painted half-walls are bang on trend, but you can also add drama by painting your window frames black (bonus – it makes greenery outside really pop). Alternatively, define a ‘headboard’ shape in paint on the wall behind a bed. Anything goes, and this is big on impact and low on commitment.”

INSTA TIP: Look out for lozenges – the shape, not the sore throat remedy, says Hall. This pill-like form is popping up in all things interiors, from tables and mirrors, to dinnerware and lamps.

Instagram your home

2. Show your bed some love

“Treat your bed the way you treat your wardrobe: Buy separates that coordinate and mix them up,” advises Hall.

“Avoid a ‘matchy-matchy’ look by choosing bed linens in different shades, which complement each other and your room. Mix block colours with contemporary Scandi prints, cottons with velvet or chic wrinkly linens, and add texture with chunky throws and cushions.

“If you think it’s hard to get out of bed now, just wait until you’ve finished piling on those lush layers.”

INSTA TIP: Take it nude! Ultra-fashionable grey has had its (very long) moment in the Insta-spotlight, Hall declares, and colours are moving in a warmer direction. Earthy neutrals, like sand, oatmeal, jute and tan, are the way to go.
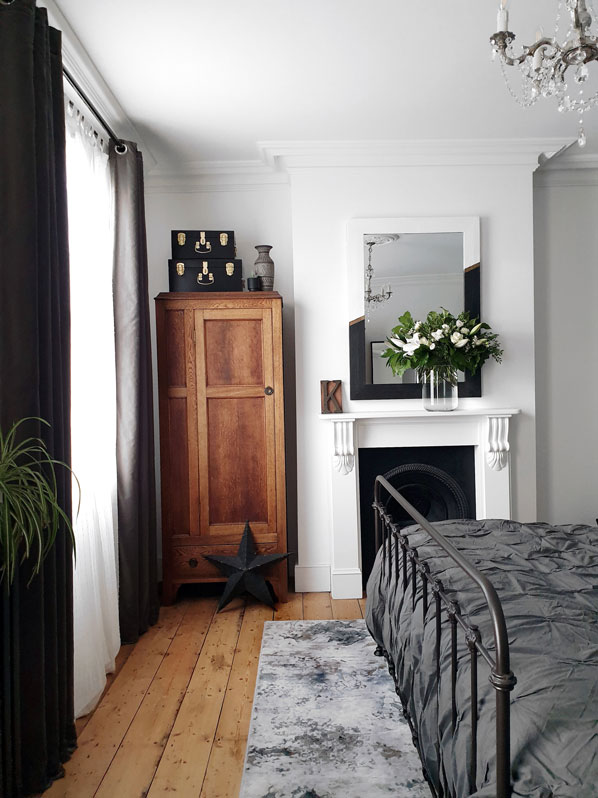
Instagram your home

3. Mix old with new

If you’re thinking of redecorating, don’t go overboard and make the mistake of simply adopting a whole style straight from one retailer, warns Hall.

“You don’t want your home to look like it was dragged-and-dropped direct

from a furniture showroom (no matter how lush the showroom in question might be),” says Hall.

“Instead,” she adds, “make the most of what you already have, and elevate the look with a few pieces that are more of-the-moment, so it retains your personality.

“That doesn’t mean holding on to a past-its-sell-by-date flat-pack bookcase or hated heirloom. Bring in new pieces by all means, but before you do, think creatively about what you already own that could be re-purposed, re-positioned, repainted, or recovered. Bear in mind that previously unpopular ‘brown’ furniture is truly enjoying a revival.”

INSTA-TIP: There are so many trends on Instagram and Pinterest, it’s easy to get carried away and constantly want the ‘latest’ look. “It can be more successful to make regular small purchases,” says Hall, “so you just reflect a new look in a small detail or colour and retain your core design ethos.”

Instagram your home

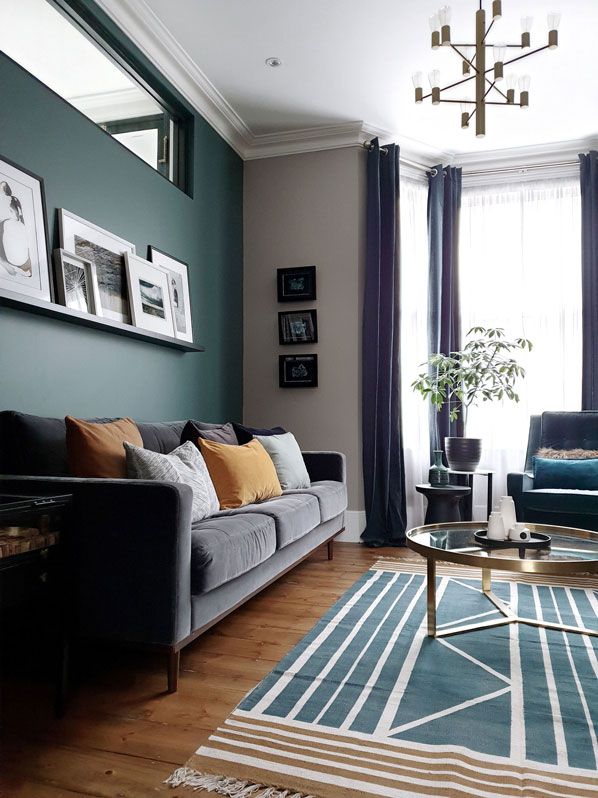
4. Banish bare walls

“A sure-fire way of making a room uninspiring is to plonk one lonely little picture on the wall and call it a day,” says Hall. “But the good news is, it’s easier than ever to find original or limited-edition art at affordable prices.

“You can find unique prints at online suppliers that won’t break the bank, or head to local art fairs, makers’ market or student art shows to bag wall decor that will set your Instagram feed apart.

“Don’t be narrow about your interpretation of art, as it doesn’t end at works on paper or canvas,” she adds. “Think contemporary textiles, wood crafts, self-adhesive murals and more. The possibilities for jazzing up an empty wall space are endless.”

INSTA TIP: Every room should have a focal point, says Hall, whether that’s a special feature or piece of furniture or art work that is really ‘wow’. Style your room around that.
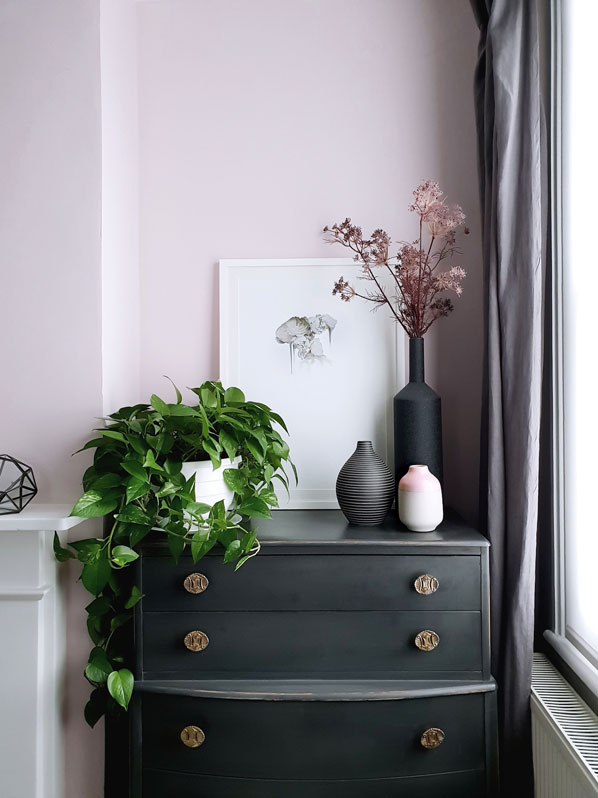
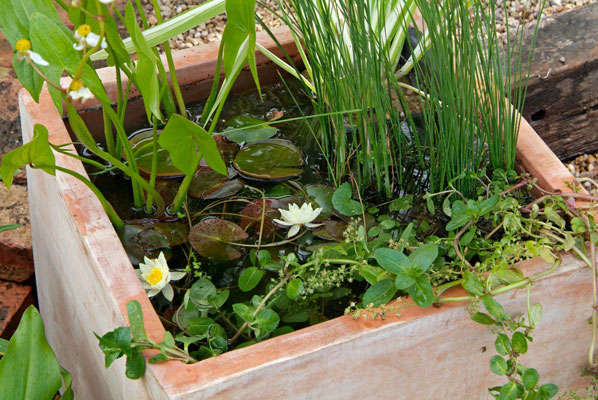
Instagram your home

5. Make it yours

“Its really important to have something unique in every room, that not everyone else can go out and buy – a star piece,” says Hall.

“It can be vintage, bespoke, something up-cycled – but it must be something that gives your home personality. I think a really important thing on Instagram is that people should be able to look at an image of yours, and know immediately that it’s yours.

“That can be difficult because there’s a lot of trends, and for months you can find everyone has the same print or chair, but finding those really special pieces is a good way of ensuring your home has its own special ‘stamp’ and identity.”

If you can’t find what you want for a room, design your own, she suggests. It can be more affordable than you think, and local craftsmen or artists or retailers may be prepared to bespoke a piece for you.

INSTA-TIP: Most people look at Instagram on their phones, so don’t try to cram too much into one shot. Use what’s called ‘negative space’ or try to narrow down the focus of the shot. A whole room can get lost in one image, so take several shots taken from different angles and close-ups of details. It’s about contrast between interesting things to look at, and giving items breathing space and allowing them to impress.

Instagram your home

6. Use natural light for winning shots

Lighting is super-important, stresses Hall. “I don’t use any artificial light in my images, and if it can be avoided, it should be. Natural daylight is always best.

“Of course, it depends a lot on individual properties and the kind of light you have at home, as well as your window treatments. But for me, bright sunshine makes it hard to take clear images. I always try to shoot on a bright but cloudy day.

“This is especially important if, like me, you only use your phone for photography. Having great images is probably 95% of what Instagram is about, and if they’re fuzzy, blurry or unclear, you won’t get the hits.”

INSTA-TIP: Don’t over-style – you don’t need to karate chop your cushions or iron creases into your curtains. Your home will be more enticing if it looks like just that – a place you love to be in – not a staged set piece.

The Ideal Home Show – the world’s longest running exhibition – runs at Olympia London until Sunday, April 7. For more information, see Idealhomeshow.co.uk

Make a Splash for Wildlife: Here’s how to Create your own Mini-Pond

As charities focus this year's Wild About Gardens challenge on ponds, this step-by-step guide will help you build your own pocket-sized pool.

create mini pond

Fancy a pond but don’t have much space? Now’s your chance to make waves with a mini-pond – which will not only look pretty, but will also attract beneficial insects and other wildlife to your plot.

Gardeners across the UK are being urged to encourage wildlife with water, as ponds form this year’s Wild About Gardens challenge, from The Wildlife Trusts and the RHS.

The UK has lost ponds, rivers and streams at a rapid rate, and only a small amount of our natural ponds and wetlands remain, the charities warn.

Helen Bostock, senior horticultural advisor at the RHS, observes: “Even cheap container ponds made from upcycled materials will quickly be colonised by a whole host of creatures, and help form a living chain of aquatic habitats across the neighbourhood.”

Here’s how to build a mini-pond yourself…

create mini pond

1. Choose your spot

Your mini-pond will need some sunlight, but not full sunlight all day. Make sure it’s in shade for some of the time. Light shade is fine and will reduce water loss. If you are thinking of placing it under a tree, a few fallen leaves aren’t a worry. However, heavy shade under a tree, together with lots of leaves blowing in, isn’t a good spot for a container pond.

A patio is ideal as it’s where you are likely to spend time watching all the wildlife come and go. But remember to add a wildlife ramp inside and out, and ideally cluster with other pots so amphibians such as frogs have a little cover while coming and going.

The best way to create shade is with another plant or two (they can be in pots), perhaps a Japanese maple or some tall grasses.

2. What type of container is best?

Be creative – is there anything you could upcycle, such as a washing-up bowl, wheelbarrow basin, sawn-off plastic dustbin, half barrel, rubber trug, large plant pot or sink?

You can easily recycle an old sink or bowl, but make sure it’s watertight. If you are using a garden container that has drainage holes in the bottom, use a piece of pond liner to cover the holes.

Unglazed terracotta containers may lose water through the sides very slowly, though quicker on hotter days. It depends on the quality of the terracotta. There will be a degree of water loss through evaporation, whatever the container.

Your pond will need a wide ‘neck’ so wildlife can get in and out. Other than that, the shape really doesn’t matter. Sink your pond or add a ramp for creatures to access.

create mini pond

3. Choose the right plants

Water forget-me-not and flowering rush are pretty. Other suitable specimens include waterlily (Nymphaea ‘Pygmaea Helvola’), Lesser spearwort (Ranunculus flammula) and Starwort (Callitriche stagnalis).

Avoid anything that is too invasive or vigorous. Water soldier and sweet flag are unsuitable for small ponds.

4. Place your plants in baskets

Place aquatic plants in baskets lifted up to the correct level of the water by standing them on bricks, stones or other pots. Aquatic baskets are ideal as they allow plenty of water flow around the roots, although normal planting pots can work too.

Use aquatic compost, which can be bought from specialist aquatic nurseries. This is heavy (so plants won’t float away) but low in nutrients (so the water won’t turn green with algae).

create mini pond

5. Fill your mini-pond with rainwater

Install a water butt to collect rainwater with which to fill your pond, and continue to use this water to top up if levels drop. Check on levels a couple of times a week in hot weather and top up as needed.

But don’t panic – even if the levels drop to half way, most creatures will survive. If desperate, just use tap water, but this contains nutrients so it’s not a good idea to regularly top up with this.

You won’t need a pump in a mini-pond to stop the water stagnating. It may go a little green at first or before the plants fill out, but it will settle down.

6. Tackle weed problems

If you get blanket weed, remove it by hand or use a barley straw extract available from pond specialist companies. Water in a wildlife pond will usually settle into a balance without needing a lot of treatments.

For more information, download the Big or Small, Ponds for All booklet – a step-by-step guide to creating the perfect pond at Wild About Gardens (wildaboutgardens.org.uk).

create mini pond

Confused about Retirement Savings? 7 Popular Pension Myths Busted!

With the next phase of automatic enrolment starting from April, Alistair McQueen from Aviva separates facts from fiction.

The minimum amounts that can be put into workplace pensions will be stepped up from April, as UK savers are encouraged to put aside more for their retirement.

Under automatic enrolment rules, from April 6, the minimum that can be put in by employers and their staff will increase from 5% of qualifying earnings to 8%. Within the new 8% rate, at least 3% must be paid by the employer, with the remaining 5% made up by staff.

Automatic enrolment started in autumn 2012, amid concerns people were living for longer but not saving enough for their later years. “Automatic enrolment is approaching its seventh birthday. In its short life, it has already brought a quiet revolution to pensions in the UK,” says Alistair McQueen, head of savings and retirement at Aviva.

Pensions are not always easy to understand, though, and there’s still a lot of confusion around them for lots of people. Do you feel unsure of the facts? Here, McQueen busts seven pensions myths…

busting pension myths

Myth 1: No one is saving into a pension

Automatic enrolment has introduced more than 10 million new savers to workplace pensions since 2012. There are now a total of 22 million people participating in workplace pensions in the UK.

Myth 2: Pensions are for old people

Contrary to popular perception, it is the under-30s who are leading the way. All ages have seen an increase in workplace pension participation since 2012, but the under-30s have seen the biggest increase – more than doubling from 35% saving to over 79% by 2018.

busting pension myths

Myth 3: The government will pay for all my retirement

It’s true that we can expect some money in retirement from the state, but this is currently up to a maximum of about £8,500 every year. Today, the majority of the typical retirees’ income in retirement is from sources beyond the state, such as private pensions and other savings.

Myth 4: I will receive my state pension from age 60 if I’m a woman, or 65 if I’m a man

These commonly referred to and long-standing ages were set decades ago, when we could generally expect a few short years in retirement. Since then, average life expectancy has greatly increased, and the age at which we are eligible for our state pension has been increasing, with women starting to qualify for their state pension at the same age as men.

The state pension age is set to keep rising too. The yourpension.gov.uk website can help you check your state pension age.

busting pension myths

Myth 5: I can’t retire until I reach my state pension age

We are free to retire whenever we want to. However, we can only really think about retiring when we feel we have saved enough money to meet our needs when we’re not working. New rules allow people to access private pensions from age 55 – but the state pension age is set by government.

As individuals, we have the freedom to choose our retirement age, but this brings with it a responsibility to ensure we can fund our lifestyle from that point onward. There are many free online resources to help make this decision – such as Aviva’s ‘My retirement planner’ (aviva.co.uk/retirement/tools/my-retirement-planner).

Myth 6: I’m the only one who is confused by pensions

Research suggests only a minority of us feel we really understand pensions. So, if you’re feeling a bit uncertain, you’re not alone. The great news is that more of us are saving for our future. And if you’re looking for a little nudge in the right direction, Aviva suggests three general rules of thumb that could help you be better prepared:

1. Save at least 12.5% of earnings towards your retirement. This can include money from your employer and the taxman.

2. If possible, start saving at least 40 years before your target retirement age.

3. Try to have built up at least 10 times your salary in your pension by the time you retire.

busting pension myths

Myth 7: Retirement is further away than ever

There’s still a collapse in workplace participation as we progress through our 50s. This represents a huge waste of talent, experience and potential. One of the strongest levers we can pull to help fund our lives in retirement is to work longer. Many employers are taking fresh steps to support a fuller working life, with the aim of ensuring that age is no barrier to opportunity.

×
Find a Property
M
Country & Equestrian