From leaky taps to holey walls, a new survey suggests we'd rather put up with problems than attempt to fix them ourselves. Abi Jackson finds out more.

Have we lost our DIY mojo? OK, so some of us never had any desire or inclination to get handy with the hammers and paintbrushes to begin with, and wouldn’t have a scooby when it comes to spanners and spirit levels – but there was a time when every household had an overflowing toolbox, maybe a workbench in the shed or garage, and the will and know-how to tackle at least those ‘safe and simple’ DIY tasks.
This may no longer be the case, though, as many of us are now certified DIY-dodgers, according to a new survey by glass specialist Pilkington (pilkington.com/en-gb/uk).

Broken toilets, damaged walls and leaky taps top the list of tasks we just can’t seem to get around to tackling, the poll of 2,000 UK homeowners found, with 21% of respondents admitting they were ‘happy’ to live with holes in their walls, rather than attempting to fix them. Meanwhile, 17% said they put up with dripping taps, and 14% confessed to living with a malfunctioning toilet! Broken door handles, it seems, are a DIY job 12.5% are happy to dodge.
I’ll get round to it one day…
Of course, if you don’t have any DIY experience, it’s understandable that the idea of tackling such tasks might be overwhelming – but why are we losing the motivation to do-it-ourselves?

According to the Pilkington poll, laziness, poor skills and lack of time are among the most common excuses, with 41% saying they’ll get the jobs done eventually (we all know this can go on for years!). A further 26% admit they haven’t fixed an issue because they’ve simply got used to living with it, while 21% confess they don’t know how to tackle the task. Almost half (40%) said they’d rather call in the professionals to get the job done.
“We used to be a nation of proud DIY-ers, but it seems the pace of modern life has left us with little time to get around to fixing those all-important jobs,” says Pilkington’s brand and communications manager, Julia Berkin. “Rather than spending time on home projects, homeowners are instead looking to the experts to help with renovations, and relying on innovative products that make their lives easier.”

Should we ditch the DIY dread?
To be fair, sometimes time really is short and there’s no rule that says we have to add ‘DIY expert’ to our ever-expanding lists of demands. Plus, if a job really would be better handled by a professional, well, that’s what they’re there for, right?
But that said, if we’re totally honest, procrastination and laziness are often the main culprits in why we aren’t getting things done ourselves, and many DIY tasks might actually be a lot simpler than you think (not to mention a lot cheaper to tackle yourself).
5 simple steps for repairing a hole in a plastered wall
Want to buck the trend and get on board with DIY? To help, we asked the pros at Homebase (homebase.co.uk) to talk us through one of the nation’s apparently most-dodged DIY job: Filling in holey walls…
- Preparing the damaged area
Use a bolster chisel and club hammer to remove all loose material around the area to be patched, and undercut the edges. Once this is complete, wire brush the brickwork to remove all traces of loose material.
- Mixing the new plaster
Mix the plaster according to the manufacturer’s instructions. Use a gauging trowel to sprinkle the plaster powder into the water, while stirring with a clean stick. When the plaster is thick and creamy without lumps, turn it onto a dampened board. Helpful hint: To prevent lumps from forming, always add the plaster to the water and not the water to the plaster.
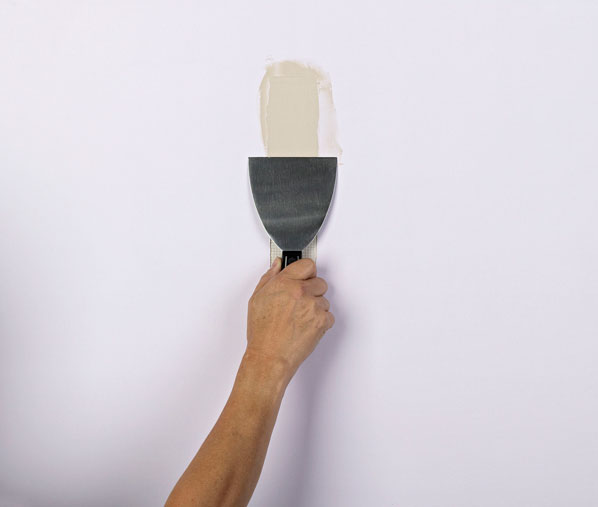
- Filling the patch with plaster
Once the new plaster is ready to use, thoroughly dampen the area of the wall that needs to be patched. Use a plastering trowel to slide a good amount of the mixture onto the plasterer’s hawk. Standing close to the patch, tilt the hawk towards you and, with a continuous movement, lift half the plaster onto the trowel.
Hold the trowel horizontally but slightly angled towards the wall. Press the plaster into the patch and move the trowel up the wall, gradually flattening it. Avoid flattening the trowel against the wall as this is causes suction and pulls the plaster off the wall. Repeat this process until the patch is slightly overfilled, but don’t overwork the plaster, as this weakens it and makes it fall off.
- Smoothing off
Once the surface is covered, smooth the plaster to an even thickness, holding the trowel at a slight angle so only one edge touches the plaster at any one time.
After about 45 minutes, the plaster will start to set. Once this has happened, go over it again lightly with a dampened trowel to smooth the surface. After a further 20-30 minutes, splash the surface with cold, clean water then trowel to a fine, smooth surface. Be sure to keep the trowel damp and not to overwork the surface.
- Filling deep holes
If the patch in question is deep, you might need to put on two layers of plaster. To do this, apply the first layer of plaster to half the depth of the patch. When it has partially set, scratch up the surface and leave it to set fully without drying out. Apply a second coat, and repeat the process as above.